Summer is a great time to give your home a fresh coat of paint. Long days, warm temps, and fewer rainstorms (fingers crossed) make it the ideal season for outdoor projects. But before you grab a brush and throw on your DIY playlist, there’s one thing that separates a paint job that lasts from one that flakes faster than a bad sunburn: proper prep.
Whether you're hiring pros or tackling the project yourself, the success of an exterior paint job starts way before the first drop of paint hits the siding. Let’s walk through exactly how to prep your home for painting in summer, because good paint can only do so much if it’s stuck to a dusty, sunbaked mess.
Check the Forecast Before Anything Else
This may seem obvious, but summer doesn’t always mean clear skies. One surprise rainstorm or a stretch of 95-degree scorchers can ruin an otherwise perfect paint plan.
Aim for days with:
Temps between 50°F and 85°F (ideal for most paints)
Low humidity (too much moisture can interfere with drying)
Cloud cover or morning/late afternoon work to avoid direct sun on surfaces
Painting in extreme heat can cause paint to dry too quickly, which leads to poor adhesion, and no one wants to repaint a year later because the siding started peeling like a banana.
Inspect Your Exterior (It Might Be Trying to Tell You Something)
Before painting, take a walk around your home like a seasoned home inspector: clipboard optional, keen eye required. This is your chance to spot trouble areas before they end up buried under fresh paint and wishful thinking. Look for:
- Peeling or flaking paint: This means the existing paint has lost its grip—those areas need to be scraped and sanded before anything new goes on.
- Soft, rotted wood: Press gently on siding, trim, or fascia boards. If it feels spongy or crumbles under pressure, it needs to be repaired or replaced—not just painted over.
- Cracked caulking around windows, doors, and trim: Old, split caulk lets in water and air. Recaulking these areas before painting helps seal out moisture and drafts.
- Mildew, algae, or dirt buildup: You’ll often see these on the north side or shaded areas of your home. They need to be fully cleaned off or they’ll just keep growing… under your new paint.
Give Your House a Bath (Yes, Really)
Paint loves a clean surface. Dirt, spider webs, pollen, and mildew all interfere with paint’s ability to stick. So before you even think about opening that paint can, your house needs a good wash.
Options:
Pressure washing: Fast, effective, but requires care to avoid damaging wood or forcing water behind siding.
Manual washing: Scrub with a stiff brush, water, and mild detergent or TSP (trisodium phosphate). More effort, but great for smaller areas or delicate surfaces.
Pro tip: Let everything dry completely (usually 24 to 48 hours) before you paint.
Scrape, Sand, and Repair
This is where elbow grease meets long-term payoff. After cleaning, remove all loose, peeling, or bubbling paint using a scraper. Then sand the rough edges for a smooth finish. The goal is to create a surface that the new paint can stick to like glue, because that’s literally what it’s supposed to do.
Don’t forget to:
Fill holes or cracks with exterior spackle or wood filler
Prime any bare or patched areas to seal the surface
Re-caulk gaps around windows and trim to keep moisture out
Skipping this step is like painting over a bandaid—it might cover the wound, but it’s not going to last.
Protect What You Don’t Want Painted
Unless you're going for the “modern art splatter” look, it’s worth taking the time to protect anything you don’t want painted. Before you start, make sure to:
Use drop cloths to cover landscaping and hardscaping
Mask off windows, doors, light fixtures, and anything you don’t want paint on
Move or cover outdoor furniture, grills, hoses, etc.
Taking the time to prep your surroundings saves you hours of cleanup and headache later.
Use the Right Tools and Paint for Summer Conditions
Different paints react differently to heat and humidity. For summer, use high-quality exterior acrylic latex paints. They’re flexible, durable, and handle weather changes better than oil-based formulas.
Make sure you also use:
A good brush for cutting in edges
Rollers or sprayers for large areas (sprayers can save time on textured surfaces)
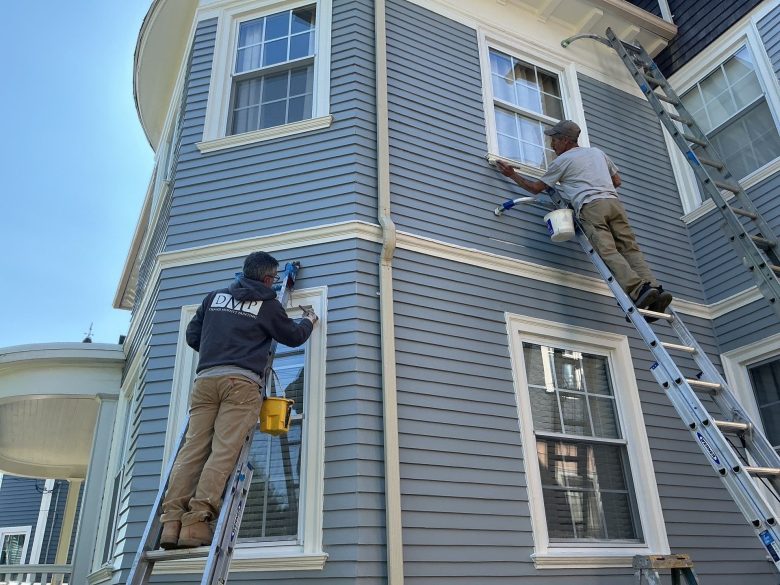
Extension ladders or scaffolding if you're going high up: safety first!
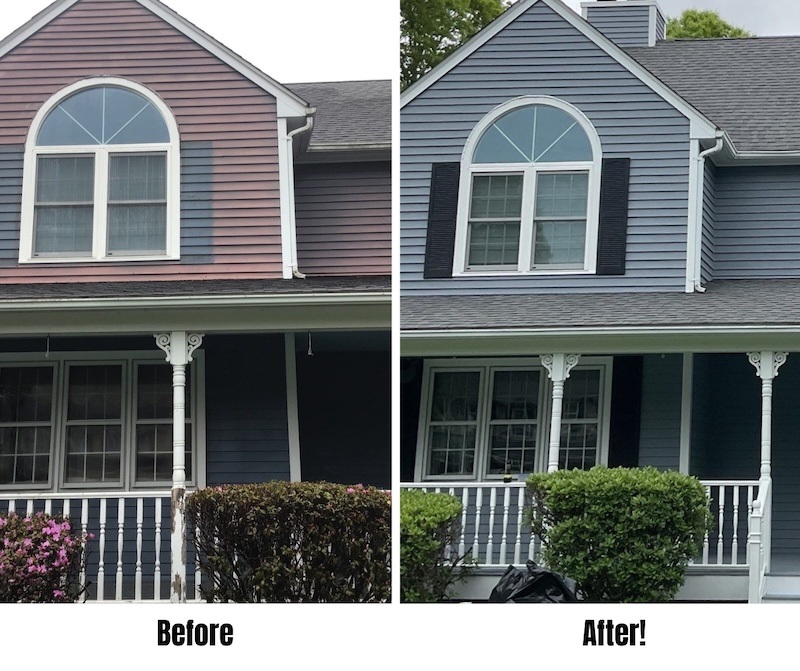
Conclusion: Prep It Right or Paint It Twice
Painting in summer can be incredibly rewarding, but only if you take the time to do it right. Cleaning, repairing, and prepping your home ensures your new paint has a solid surface to stick to and lasts for years, not just until the next heat wave.
So whether you're DIYing or calling in the pros, remember: it’s not the paint that fails, it’s the prep you skip.
And hey, if you need help making sure the job gets done right the first time, we know a team.
At DMP, We’ve Got Prep (and Paint!) Down to a Science
At DMP, we specialize in high-quality exterior painting that doesn’t just look great, it protects your home where it matters most. Our team understands how moisture, sunlight, and time can wear down even the toughest surfaces, and we’re here to help you stay ahead of costly repairs. From thorough surface preparation to precise, high-quality application, we ensure every paint job is built to last.